
WordPress Website Setup Guide for Small Business Owners
A WordPress website setup is the process of registering a domain, selecting hosting, installing WordPress, configuring your site settings, and publishing your core pages to create a live business presence online. WordPress powers over 43% of all websites globally, making it the most widely adopted content management system for businesses of every size. With modern tools like one-click installers and managed hosting platforms, setup takes 30 to 60 minutes for a basic functional site. This guide walks you through every stage of the process, from prerequisites to pre-launch checks, so you can go live with confidence and without costly mistakes.
What you need before starting your WordPress website setup
Every successful WordPress site launch starts with two decisions made before you touch an installer: your domain name and your hosting provider. Getting these right saves hours of frustration later.
Choosing and registering your domain name
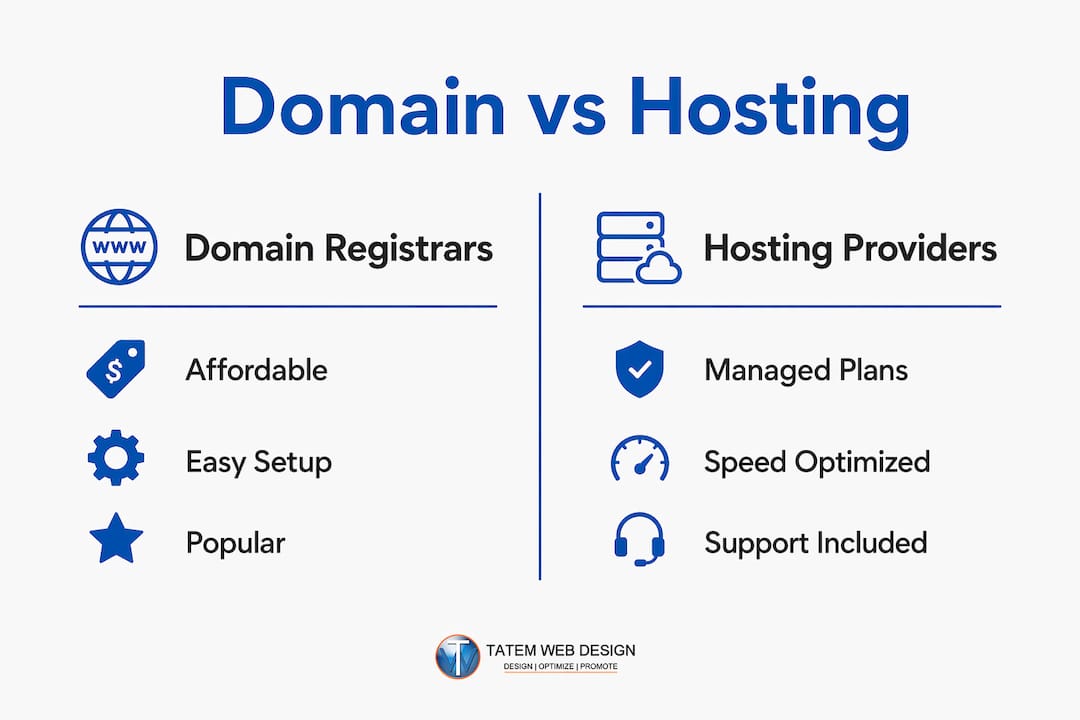
Your domain name is your business address online. Registrars like Namecheap and Google Domains offer straightforward registration interfaces, and domain registration costs between $10 and $15 per year for most .com addresses. That pricing makes it one of the lowest-cost investments in your entire business infrastructure. Many hosting providers bundle a free domain for the first year, so check your host’s offer before registering separately.
Choose a domain that matches your business name as closely as possible. Keep it short, avoid numbers and special characters, and stick with .com unless your business has a strong reason to use an alternative extension. A domain like “stuartlawfirm.com” beats “the-best-law-firm-in-stuart-fl-2026.com” every time.
Selecting the right hosting provider
Managed WordPress hosting improves site speed, security, and reduces the technical burden for beginners by handling automatic updates, daily backups, and server optimization. Providers like WP Engine, Kinsta, and SiteGround offer managed WordPress plans starting around $25 per month. Shared hosting from Bluehost or Hostinger works for tight budgets, though you take on more configuration responsibility.

Pro Tip: Opt for managed WordPress hosting if you want to spend your time running your business rather than managing server configurations. The monthly cost difference is minimal compared to the hours you save.
Comparison of domain and hosting options for beginners
| Option | Best for | Approximate cost | Key feature |
|---|---|---|---|
| Namecheap | Domain registration | $10 to $15/year | Affordable, clean interface |
| Google Domains | Domain registration | $12/year | Google integration, simple DNS |
| Bluehost (shared) | Budget hosting | $3 to $10/month | Free domain first year |
| SiteGround | Beginner managed hosting | $15 to $25/month | Excellent support, staging |
| WP Engine | Advanced managed hosting | $25+/month | Best performance, auto-updates |
Before you log into any installer, also prepare your admin credentials. Choose a strong username that is not “admin” (a common attack target), create a secure password using a tool like 1Password or Bitwarden, and note your hosting control panel login separately from your WordPress login.
How to install WordPress step by step
Installing WordPress is faster than most business owners expect. The process breaks into two paths: one-click installation via your hosting dashboard, or manual installation for developers who need custom database configurations.
Using one-click installers
Most hosting providers, including Bluehost, SiteGround, and Hostinger, include Softaculous or a proprietary installer in their cPanel or custom dashboard. The steps are consistent across platforms:
- Log into your hosting control panel (cPanel or the host’s custom dashboard).
- Locate the WordPress installer, usually labeled “WordPress” or found under “Auto Installers.”
- Click “Install Now” and select your domain from the dropdown menu.
- Set your site name, admin username, admin email, and a strong password.
- Choose the latest WordPress version (always the default selection).
- Click “Install” and wait 60 to 90 seconds for the process to complete.
- Open the confirmation email or note the admin URL provided, typically yourdomain.com/wp-admin.
- Log into your WordPress dashboard using the credentials you set in step 4.
- Verify the install by visiting your domain in a browser and confirming the default theme loads.
Pro Tip: Always install the latest WordPress version. Older versions contain known security vulnerabilities that automated bots actively exploit within days of a public disclosure.
Manual installation for advanced users
Manual installation involves downloading WordPress from WordPress.org, creating a MySQL database in your hosting panel, uploading the WordPress files via FTP using FileZilla, and running the five-minute install wizard at yourdomain.com/wp-admin/install.php. This method gives you full control over database naming and file structure. For most small business owners, the one-click installer delivers identical results with far less effort.
Configuring initial WordPress settings
After logging in, go to Settings > General and set your site title and tagline. Then go to Settings > Permalinks and select “Post name” as your URL structure. This gives you clean URLs like yourdomain.com/about instead of yourdomain.com/?p=2, which matters for both SEO and readability. Set your timezone under Settings > General to match your business location. Under Settings > Reading, confirm your site is not set to discourage search engines, a setting covered in detail in the pre-launch section below.
How to choose and customize a WordPress theme for your business
Your theme controls every visual element of your site: layout, typography, color scheme, and spacing. Choosing the right one at the start prevents hours of redesign work later.
Browsing and selecting a theme
The WordPress theme directory at wordpress.org/themes contains over 11,000 free themes. Filter by “Business” or your industry to narrow the options. For small business owners, the most reliable starting points are Astra, Kadence, and GeneratePress. All three are lightweight, load quickly, and work with major page builders like Elementor and Beaver Builder.
When evaluating a theme, check these criteria before installing:
- Responsiveness: The theme must look correct on mobile devices. Over 60% of web traffic comes from smartphones.
- Page builder compatibility: Confirm the theme works with Elementor or your preferred builder.
- Last updated date: Avoid themes not updated within the past 12 months. Outdated themes create security gaps.
- Active installations and ratings: Themes with 100,000+ active installs and 4-star ratings have proven track records.
- Industry relevance: A legal services firm benefits from a clean, formal layout. A restaurant needs visual food photography support.
Installing and activating your theme
Go to Appearance > Themes > Add New in your WordPress dashboard. Search for your chosen theme, click “Install,” then “Activate.” Your site immediately switches to the new design. From there, go to Appearance > Customize to adjust colors, fonts, and header images using the live preview panel.
For safe long-term customization, follow proper theme customization practices by creating a child theme before making code-level changes. A child theme inherits the parent theme’s design but keeps your modifications separate, so theme updates never overwrite your work. Skipping this step is one of the most common and costly mistakes beginners make.
What plugins does your WordPress site actually need?
Plugins extend WordPress functionality, but more is not better. Installing only essential plugins reduces load times and security vulnerabilities. Start lean and add plugins only when a specific business need requires them.
Pro Tip: Limit your initial plugin list to five categories: SEO, security, backups, contact forms, and caching. Every plugin you add is a potential performance drag and security surface. Review your plugin essentials before installing anything beyond the core five.
Core plugins every business site needs
- SEO: Yoast SEO or Rank Math. Both generate XML sitemaps, manage meta titles and descriptions, and provide on-page optimization guidance. Rank Math offers more features in its free tier.
- Security: Wordfence Security. It provides a firewall, malware scanner, and login protection. Pair it with WordPress security best practices for full coverage.
- Backups: UpdraftPlus. Schedule daily backups to Google Drive or Dropbox. Restore from backup in under 10 minutes if something goes wrong.
- Contact forms: WPForms or Contact Form 7. WPForms has a more intuitive drag-and-drop builder; Contact Form 7 is lighter and free.
- Caching: WP Rocket (paid) or LiteSpeed Cache (free). Both dramatically reduce page load times by serving cached versions of your pages.
Creating your key website pages
Every business site needs five foundational pages before launch: Home, About, Contact, Privacy Policy, and Blog. Go to Pages > Add New to create each one. Write your Home page content first, as it sets the tone for everything else. Your About page should explain who you are, who you serve, and why clients choose you. Your Contact page must include a working form, your phone number, and your business address.
After creating your Home page, go to Settings > Reading and set “Your homepage displays” to “A static page,” then select your Home page from the dropdown. This tells WordPress to show your designed Home page instead of a blog feed. Build your navigation menu under Appearance > Menus, linking all five pages so visitors can find them from any page on your site.
Pre-launch checks: is your WordPress site ready to go live?
Skipping pre-launch checks is the fastest way to undermine weeks of work. Small oversights like inactive SSL or broken contact forms damage visitor trust and SEO more than major technical errors. Work through this checklist before you tell anyone your site is live.
Pro Tip: Run your site through GTmetrix or InspectWP before launch. Both tools identify performance bottlenecks, broken resources, and configuration issues in a single scan. GTmetrix is free and takes under two minutes to generate a full report.
Critical pre-launch checklist
| Check | What to verify | Why it matters |
|---|---|---|
| SSL certificate | HTTPS loads without browser warnings | Encrypts data, builds trust, required for Google ranking |
| Search engine visibility | “Discourage search engines” is unchecked | Leaving noindex enabled is the #1 cause of new sites not appearing in Google |
| Contact forms | Submit a test entry and confirm delivery | Broken forms mean lost leads |
| Page speed (TTFB) | TTFB under 600ms | Directly affects SEO rankings and bounce rate |
| Caching and compression | Caching plugin active, images compressed | Caching and compression dramatically improve load times |
| Google Search Console | Sitemap submitted | Accelerates indexing of all pages |
| Backup configuration | UpdraftPlus scheduled and tested | Protects against data loss from day one |
SSL provisioning requires a specific sequence. Add your domain to your hosting panel before updating your DNS records to avoid certificate errors that can delay your launch by 24 to 48 hours. Once SSL is active, force HTTPS site-wide by installing a plugin like Really Simple SSL or by adding the redirect rule directly in your .htaccess file.
Treat your WordPress performance optimization as an ongoing task, not a one-time box to check. Page speed affects both Google rankings and how long visitors stay on your site. A site that loads in under two seconds converts significantly better than one that takes four or more seconds.
Key takeaways
A successful WordPress launch requires completing domain setup, hosting configuration, installation, theme selection, plugin installation, page creation, and pre-launch verification before going public.
| Point | Details |
|---|---|
| Start with the right hosting | Managed WordPress hosting reduces setup complexity and improves speed from day one. |
| Install only core plugins | Limit initial plugins to SEO, security, backup, forms, and caching to avoid bloat. |
| Fix the noindex setting | Uncheck “Discourage search engines” before launch or your site will be invisible to Google. |
| Verify SSL before DNS changes | Add your domain to hosting before updating DNS to prevent certificate provisioning failures. |
| Treat launch as a process | Launch is a milestone, not a finish line. Plan for ongoing performance and security reviews. |
What I’ve learned from watching business owners launch WordPress sites
After working with dozens of small business owners on their first WordPress sites, the pattern I see most often is not technical failure. It’s launch-day panic caused by skipping the checklist. Someone spends three weeks building a beautiful site, hits publish, and then discovers their contact form emails are going to spam, their SSL shows a warning in Chrome, or their site is invisible to Google because the noindex box was never unchecked.
The fix is treating your launch as a structured process rather than a single moment. Build your site in a staging environment or with search engines blocked, then work through every item on your pre-launch checklist before flipping the switch. That discipline separates business owners who launch confidently from those who spend the first week firefighting.
The other mistake I see constantly is plugin overload. A new WordPress site does not need 20 plugins. It needs five good ones. Every additional plugin is a potential conflict, a performance drag, and a security surface. I have seen sites with 35 active plugins where half were doing nothing useful. Start with the essentials and add only when a real business need demands it.
One more thing: your launch is not the end of the project. The sites that perform best six months after launch are the ones where the owner committed to a WordPress maintenance checklist from day one. Regular updates, monthly backups, and quarterly performance reviews keep your site fast, secure, and competitive. Building that habit early costs almost nothing. Ignoring it until something breaks costs far more.
— Matt
How Tatemweb helps small businesses launch professional WordPress sites
Small business owners in Florida have a faster path to a professional, high-performing WordPress website than building it alone.

Tatemweb has spent over 26 years building custom WordPress websites for businesses across real estate, healthcare, legal, marine, and professional services. Their team handles everything from domain setup and managed hosting configuration to theme customization, plugin optimization, and ongoing security monitoring. For businesses that want more than a standard site, Tatemweb integrates AI-powered website design and AI chatbots that capture leads and engage visitors automatically. Their AI security enhancements protect your site from day one. Call Tatemweb directly at 772-224-8118 to schedule a consultation and get your WordPress site built right the first time.
FAQ
How long does it take to set up a WordPress website?
A basic WordPress site with a theme, core plugins, and five pages takes 30 to 60 minutes using a one-click installer. A fully customized business site with branded design and content typically takes several days to two weeks.
What is the difference between WordPress.com and WordPress.org?
WordPress.org is the self-hosted platform where you install WordPress on your own hosting account and have full control. WordPress.com is a hosted service with more restrictions on plugins and customization, making WordPress.org the better choice for business websites.
Do I need coding skills to set up a WordPress site?
No coding skills are required for a standard WordPress setup. One-click installers, visual theme customizers, and page builders like Elementor handle all design and layout tasks without touching code.
Why is my new WordPress site not showing up in Google?
The most common cause is the “Discourage search engines from indexing this site” setting being left active after launch. Go to Settings > Reading and confirm that checkbox is unchecked, then submit your sitemap through Google Search Console.
How many plugins should a new WordPress site have?
Start with five core plugins covering SEO, security, backups, contact forms, and caching. Adding more plugins beyond genuine business needs increases load times and creates additional security vulnerabilities.
Recommended
Tatem Web Design
26+ YearsWeb Design & SEO Specialist · Tatem Web Design
Matt Tatem has been designing websites professionally since 1999, making Tatem Web Design one of Florida's longest-running web agencies. Based in Stuart, FL, he specializes in WordPress, local SEO, Shopify e-commerce, and cybersecurity consulting for small businesses.

Rank in ChatGPT in 90 Days With a Practitioner Led Checklist
Follow a practitioner led 90 day plan to get cited by ChatGPT: allow OAI-SearchBot, publish short answer capsules with schema, and track Bing AI Performance.

AI SEO Content Playbook: 16 GEO Signals for Agencies & Teams
A practical playbook mapping the GEO-16 signals to hands-on editorial workflows, review controls, and metrics. For agencies and in-house teams scaling AI...

Copy Ready Local Schema Markup for SMBs + Google Validation
Copy ready JSON-LD examples and Google validation steps for SMBs' local schema markup. Audit, implement, and verify each location page with confidence.