
What Is Website Migration? A Guide for Business Owners
Website migration is the process of transferring a website’s files, databases, domains, and services to a new environment while preserving its search rankings, uptime, and user experience. The term covers a wide range of scenarios: moving to a new hosting provider, switching CMS platforms like WordPress or Drupal, changing your domain name, restructuring your URL architecture, or upgrading from HTTP to HTTPS. Each scenario carries real risk. A poorly planned migration can wipe out years of SEO progress, take your site offline during peak hours, or silently break your email. Done right, a migration strengthens your site’s foundation and sets you up for long-term growth.
What is website migration and what does it actually involve?
Website migration is the controlled transfer of a website from one technical environment to another. The industry also calls this a site migration or hosting migration, depending on the scope. At its core, the process moves four categories of assets: website files, databases, DNS records, and third-party service configurations like SSL certificates and email settings.
The scope of a migration determines its complexity. Moving a small static site to a new host might take one to two hours. A large enterprise platform with thousands of pages, custom integrations, and active e-commerce can take days to weeks to complete. That range matters when you are setting expectations with your team or clients.

The benefits of website migration are real and measurable. Business owners migrate sites to gain faster server speeds, better security infrastructure, lower hosting costs, or access to a CMS that supports their growth. A Florida law firm moving from a slow shared host to a managed WordPress environment, for example, can see meaningful improvements in page load time and Google rankings within weeks of a clean migration.
What makes migration different from a simple backup-and-restore is the coordination required. You are not just copying files. You are managing DNS propagation timing, preserving link equity, maintaining email continuity, and keeping the live site available throughout the process.
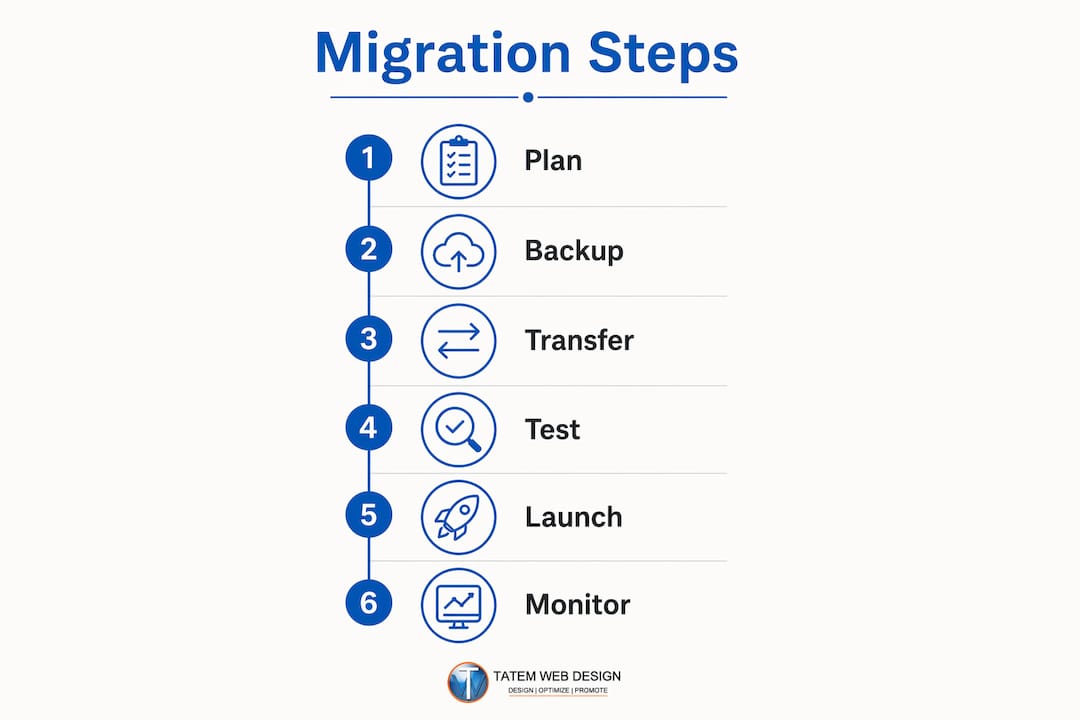
What does the website migration process look like step by step?
A safe migration follows a defined sequence. Skipping steps is the most common cause of downtime and data loss.
-
Audit your current environment. Catalog every asset: website files, databases, email accounts, DNS records, SSL certificates, and third-party integrations like Google Analytics, payment gateways, and CRM connections. Missing one integration during a move is how businesses lose form submissions or payment data.
-
Lower your DNS TTL. Set your DNS Time to Live (TTL) value to 300 seconds at least 48 hours before the migration. A lower TTL means DNS changes propagate faster across the internet, which shrinks the window where some visitors see the old site and others see the new one.
-
Build a staging environment. Copy your site to the new host using a temporary URL or staging subdomain. This is where you test everything before going live. WordPress users can use plugins like Duplicator or All-in-One WP Migration to move site files and databases to the staging environment quickly.
-
Transfer files and databases. Move your website files via FTP, SFTP, or your hosting control panel (cPanel or Plesk). Export your database from the old host and import it to the new one. Update your site’s configuration file to point to the new database credentials.
-
Test on the staging environment. Check every page, form, checkout flow, and third-party integration before touching DNS. Verify SSL certificate installation. Confirm that your analytics tracking codes fire correctly.
-
Sync dynamic data last. For sites with active user accounts or e-commerce orders, export a final database snapshot right before the DNS cutover. This captures any orders or registrations that came in during the staging period.
-
Update DNS records. Change your domain’s A-record to point to the new server’s IP address. Avoid changing nameservers unless absolutely necessary, as nameserver changes take longer to propagate and add risk.
-
Monitor and maintain the fallback. Keep your old hosting environment live for 3–7 days post-migration as a fallback. If critical issues appear on the new host, you can revert DNS quickly without losing your site.
Pro Tip: Most migration problems come from DNS propagation delays, not from the file transfer itself. Lowering TTL early is the single highest-impact step you can take before moving a live site.
What are the different types of website migration?
Not all migrations are equal. The type of migration you are performing determines the risks you face and the steps you must prioritize.
| Migration type | Primary risk | Complexity level |
|---|---|---|
| Hosting provider change | Downtime during DNS cutover | Low to medium |
| Domain name change | SEO ranking loss from URL changes | High |
| CMS or platform change | Broken functionality, lost content | High |
| HTTP to HTTPS upgrade | Mixed content warnings, redirect errors | Medium |
| URL structure redesign | Loss of link equity, 404 errors | Very high |
| Site merge or consolidation | Duplicate content, redirect chains | Very high |
Hosting provider changes are the most common migration type. You keep the same domain and CMS. The main risk is downtime during DNS cutover, which proper TTL management controls.
Domain name changes carry the highest SEO risk outside of full URL restructuring. Every inbound link pointing to your old domain loses its value unless you set up permanent 301 redirects. Changing domain or URL structure is the highest-risk event in any migration for search rankings.
CMS or platform migrations, such as moving from Joomla to WordPress or from a custom-built site to Shopify, require rebuilding content structure, templates, and plugin functionality. These migrations often change URL patterns, which compounds the SEO risk.
HTTP to HTTPS upgrades are lower risk but still require attention. Mixed content warnings appear when a page loads over HTTPS but pulls in images or scripts over HTTP. Every internal link and asset reference needs updating.
Key considerations for any migration type:
- Map all existing URLs before starting and identify which ones have inbound links or search traffic.
- Build a redirect map that covers every URL that will change.
- Test redirects before DNS cutover, not after.
- Preserve canonical tags and meta data through the transition.
How do you protect SEO and user experience during migration?
SEO protection during migration comes down to one principle: never let a URL disappear without a permanent redirect pointing to its replacement. 301 redirects must be tested before going live, using 301 status codes rather than 302 temporary redirects. A 302 tells search engines the move is temporary and does not transfer link equity.
The practical steps for SEO protection include:
- Crawl your current site with a tool like Screaming Frog before migration to capture every URL, title tag, meta description, and canonical tag.
- Build a redirect map that pairs every old URL with its new destination. For large sites, this is a spreadsheet task that takes time but prevents ranking drops.
- Verify SSL continuity. A lapse in your HTTPS certificate causes browser warnings that drive visitors away and signal instability to search engines.
- Preserve your analytics setup. Confirm that Google Analytics or your analytics platform fires on every page of the new site before DNS cutover.
- Monitor rankings and traffic for at least 30 days post-migration. Use Google Search Console to catch crawl errors and index coverage drops early.
“Pre-migration 301 redirect mapping is the best safeguard against ranking drops. Build the map before you move a single file.” — SEO professionals via Search Engine Land
Email continuity is a separate but equally critical concern. Improperly migrated MX and SPF records cause silent email loss. Businesses go hours or days without receiving client emails and never know it. Copy your MX, SPF, DKIM, and DMARC records from the old DNS zone to the new one before switching. Verify them with a tool like MXToolbox after the cutover.
Pro Tip: Do not rely on your hosting provider to migrate email records automatically. Pull your full DNS zone file from the old host and compare it line by line with the new host’s DNS settings before you flip the switch.
For professional services businesses, the stakes are especially high. A professional services website that loses search visibility during a migration can see lead flow drop significantly before rankings recover.
What tools and techniques make website migration safer?
The right tools reduce manual error and speed up validation at every stage of the migration.
-
WordPress migration plugins. Plugins like Duplicator, All-in-One WP Migration, and WP Migrate DB handle file and database transfers for WordPress sites. Automating migration via WordPress plugins can complete smaller site migrations in under an hour when preparation is thorough. These tools are not a substitute for testing, but they eliminate the manual FTP steps that cause errors.
-
Staging environments. Every major hosting provider, including SiteGround, WP Engine, and Kinsta, offers one-click staging environments. Use staging to run the full migration before touching your live DNS. Test every form, every checkout, and every third-party API connection on staging first.
-
DNS management tools. Cloudflare gives you granular control over TTL values and lets you pre-stage DNS records before activating them. This is particularly useful for zero-downtime migrations where timing is critical.
-
Crawling and validation tools. Screaming Frog SEO Spider crawls your staging site and flags broken links, missing redirects, and missing meta data before you go live. Google Search Console’s URL Inspection tool confirms whether Google can access and index your new pages after migration.
-
Project management software. Coordinating migration tasks solely via email leads to missed dependencies and errors. Use a project management tool like Asana, Trello, or Basecamp to assign tasks, track dependencies, and document decisions. A migration involves developers, content managers, SEO specialists, and often a hosting provider. All of them need a shared source of truth.
A practical website migration checklist covers these phases:
- Pre-migration: audit assets, lower TTL, build redirect map, set up staging
- During migration: transfer files and database, test on staging, sync final data
- DNS cutover: update A-records, verify SSL, confirm analytics
- Post-migration: monitor rankings, check crawl errors, keep old host live for 3–7 days
For teams planning a full site redesign alongside a migration, a website redesign guide that addresses both SEO and AI integration can help you avoid compounding risks by changing too many variables at once.
Key Takeaways
A successful website migration requires pre-migration planning, tested redirects, DNS timing control, and post-launch monitoring to protect both uptime and search rankings.
| Point | Details |
|---|---|
| Lower DNS TTL early | Set TTL to 300 seconds at least 48 hours before migration to speed propagation. |
| Build a redirect map first | Map every URL that will change and test 301 redirects before DNS cutover. |
| Protect email records | Copy MX, SPF, DKIM, and DMARC records to the new host before switching DNS. |
| Use a staging environment | Test all functionality on a staging URL before touching your live site. |
| Keep the old host live | Maintain the old hosting environment for 3–7 days post-migration as a fallback. |
What I have learned from managing website migrations
The biggest mistake I see business owners make is treating migration as a purely technical task. They hand it to a developer, set a deadline, and expect a clean result. What actually happens is that the developer moves the files correctly, but nobody mapped the redirects, nobody checked the email records, and nobody tested the checkout flow on staging. The site goes live, rankings drop, and clients start calling to say their emails are bouncing.
Migration is a cross-functional project. It needs a project manager, not just a developer. The developer handles file transfers and DNS. The SEO specialist owns the redirect map and post-launch monitoring. The business owner or webmaster needs to sign off on a tested staging environment before DNS ever changes. When those roles are clearly assigned and tracked in a project management system, migrations go smoothly. When they are coordinated over email threads, things fall apart.
The “move now, fix later” mindset is the other major failure pattern. I have seen businesses push a migration live on a Friday afternoon because the developer said it was ready, only to spend the weekend firefighting broken forms and missing pages. Thorough testing on staging before cutover is not optional. It is the entire point of having a staging environment.
My honest recommendation: give yourself more time than you think you need. Small sites can migrate in an hour, but the testing, redirect mapping, and post-launch monitoring add days to any responsible timeline. For a WordPress site with active e-commerce, budget at least a week of preparation before you touch DNS. The sites that migrate cleanly are the ones where the team did the boring work upfront.
— Matt
Tatemweb can handle your website migration from start to finish
Website migration is one of the highest-risk technical events a business website goes through. One missed redirect or improperly configured DNS record can cost you weeks of search visibility and client leads.
Tatemweb has managed website migrations for businesses across Florida for over 26 years, from simple hosting transfers to full platform rebuilds with AI-powered design. The team handles redirect mapping, DNS timing, SSL configuration, and post-launch monitoring so you do not have to. If you are planning a migration alongside a site upgrade, explore Tatemweb’s AI website design services to see how a professionally managed migration and redesign can be completed together without disrupting your rankings or your business. Call Tatemweb directly at 772-224-8118 to schedule a consultation.
FAQ
What is website migration in simple terms?
Website migration is the process of moving your website to a new host, domain, platform, or URL structure while keeping it live and preserving its search rankings. It involves transferring files, databases, and DNS records to the new environment.
How long does a website migration take?
Small static sites migrate in 1–2 hours, while large or complex platforms can take several days to weeks. The timeline depends on site size, the number of integrations, and how much redirect mapping is required.
Will website migration hurt my SEO rankings?
Migration can cause temporary ranking fluctuations, but comprehensive 301 redirect mapping and pre-launch testing minimize the risk. Monitoring Google Search Console for crawl errors in the weeks after migration catches any remaining issues quickly.
What is the biggest risk during a website migration?
DNS propagation delays and incorrect record changes cause most migration problems, not the file transfer itself. Lowering your DNS TTL to 300 seconds at least 48 hours before migration significantly reduces this risk.
Do I need to migrate my email when I migrate my website?
Yes. Email records including MX, SPF, DKIM, and DMARC must be copied to the new DNS zone before switching. Failing to do so causes silent email loss that can go undetected for hours or days.
Recommended
Tatem Web Design
26+ YearsWeb Design & SEO Specialist · Tatem Web Design
Matt Tatem has been designing websites professionally since 1999, making Tatem Web Design one of Florida's longest-running web agencies. Based in Stuart, FL, he specializes in WordPress, local SEO, Shopify e-commerce, and cybersecurity consulting for small businesses.
What a CMMC Level 2 Assessment Requires and How to Prepare
Prepare for your CMMC Level 2 assessment by understanding requirements, assessment paths, and mapping your Controlled Unclassified Information.

A Data Retention Policy Is Your Rulebook for Keeping and Deleting Data
Establishing a clear data retention policy helps manage data risk, ensuring compliance and effective data management for your organization.

Law Firm Local SEO: A Practical Playbook for More Local Clients
Unlock more local clients for your law firm with effective local SEO strategies. Optimize your Google Business Profile and boost your visibility!